How to wind-correct a heading using the HSI
By Rory Bennett (ATPL, FI: CPL, IR, ME, UPRT, FIC) · Published 25 May 2026
Direct answer
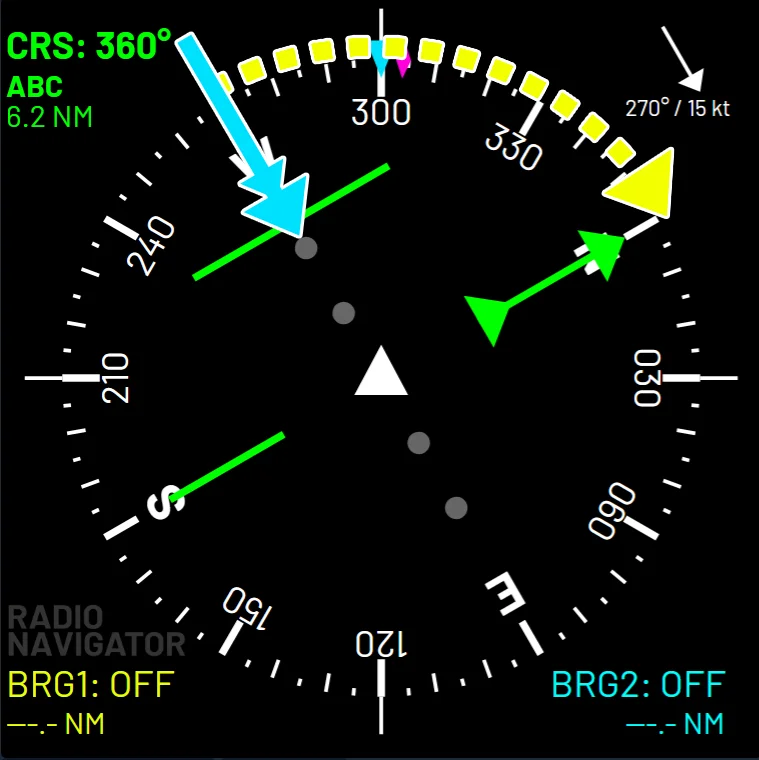
Set the course pointer to the desired track. Picture where the wind is coming from on the HSI face. The angle from the wind to the course pointer, as a fraction of 60, is the fraction of max drift to apply. Apply it into wind from the track. The result is your wind-corrected heading[1].
The full technique in under a minute. Transcript is below the video.
Video transcript
Why use the HSI for wind correction?
The HSI already has the geometry drawn on it. The course pointer marks your track and the compass rose marks every bearing around you. Once you can picture the wind direction on the rose, the angle you need for the clock code is already there to be read. No need for a wizz-wheel!
You will use this technique on a diversion, on an ATC-given track, when tracking a navaid, on an instrument approach, or even to hold the runway centreline after takeoff or on approach - anywhere you need a heading to fly a track in wind.
You can try it now: the free HSI simulator runs in the browser with live wind, no account needed.
How to set up the HSI
- Work out your max drift (60 ÷ TAS × wind speed)
- Set the course pointer (CRS) to the desired track. If you do not have a course pointer, picture where that track sits on the DI compass card.
- Picture where the wind direction sits on the HSI rose.
How to read the drift angle
Look at the angle on the rose between the wind direction and the course pointer. Take that angle up to 60 degrees as a fraction of 60: that is the fraction of max drift to apply.
- 60 degrees to 90 degrees: full max drift applies.
- Greater than 90 degrees: take away 90, or look at the angle from the track reciprocal to the wind.
Apply the correction into wind from the track. You now have your wind-corrected heading.
Worked example
Scenario: the wind direction on the HSI sits 20° off the track
Clock code: 20 ÷ 60 = 1/3. Drift is 1/3 of max drift.
Drift: if max drift is 18°, drift = 1/3 × 18° = 6°.
Heading: apply 6° into wind from the track. The result is your wind-corrected heading.
What if the wind is behind the aircraft?
If the angle from track to wind is more than 90°, the wind sits behind the wing-tip line. Read the angle from the reciprocal of the track to the wind, and apply the same clock-code rule . The drift is still applied into wind from the track.
Common mistakes
- Forgetting to calculate max drift. Before calculating the WCA, you need to calculate Max Drift based on TAS and Wind Velocity. (60/TAS)*WV .
- Applying the correction the wrong way. Drift is always applied into wind from the track. Look at the direction the wind is coming from on the HSI, apply WCA that way.
- Using the wrong factor with the wind from behind With the wind from behind, you will have to either take 90 from the angle from track to wind, or look at the angle from the reciprocal of track (tail of CRS needle) to the wind.
Practise this in the simulator
Use the simulator to practise this procedure. You can change the wind and monitor the instruments in your browser.
7-day free trial, no card required. Includes Just Fly, the Intercept Trainer and the Hold Visualiser. Reverts to the free tier when it ends; you are never charged automatically.
More about the tools for this topic:
- HSI simulator runs in the browser with no account, so you can bracket a drift correction and watch the track settle.
Check your understanding
Read each question. Decide on your answer. Then select Show answer to check it.
Show answer
Show answer
Frequently asked questions
What if I do not have a course pointer (plain DI only)?
The technique still works on a plain DI. Picture where the desired track sits on the compass card and measure the angle from there to the wind direction.
Does this work for any aircraft?
Yes. The geometry is identical whether the instrument is a mechanical HSI, an EHSI on a glass PFD, or a plain DI with mental sketching. The only thing that changes is how you visualise the course on the rose.
Why does the angle work as a fraction of 60?
The clock code is the small-angle approximation of sin(θ). For θ up to about 60°, sin(θ) ≈ θ ÷ 60 to within a couple of percent, which is well inside cockpit precision. Above 60° the approximation breaks down, which is why the technique caps at full max drift past 60°. See FAA-H-8083-15B, Instrument Flying Handbook, chapter on wind triangles.
When should I stop using the clock-code method and reach for a calculator?
For tracking, approach, and en-route correction the clock code is accurate enough, typically within one or two degrees. For flight planning, performance-limited legs, or any situation where you need the exact heading and groundspeed together (long over-water leg, fuel-critical diversion), use a wind triangle on the E6B, an EFB, or the FMS, which solve the geometry exactly.
Sources
- Good Flying Made Easy, How to wind correct a heading using the HSI. youtube.com/watch?v=NeWIEH6mW20
- Good Flying Made Easy, Wind Corrections: How to calculate a wind corrected heading and groundspeed (long-form companion). youtube.com/watch?v=32Ty5XRZbe4
Related articles
This article is for study. Follow the instructions from your qualified flight instructor. Use current charts, procedures, and the regulations from your aviation authority.
© 2026 RHBA Radio Navigator. All rights reserved.